There’s something magical about finding a recipe that’s both simple enough for weeknights and delicious enough to impress guests — and Air-Fryer Chicken Breast is exactly that kind of kitchen hero. Tender, juicy, and perfectly seasoned, this chicken breast recipe captures everything we crave in a wholesome meal while using one of the most revolutionary kitchen tools of the modern era — the air fryer.
The air fryer has changed the way we cook. It’s the perfect bridge between convenience and culinary quality — a tool that gives us crispy, golden results without drowning our food in oil. And when it comes to cooking chicken breast — a protein notorious for drying out — the air fryer delivers results that are nothing short of game-changing. It seals in the juices, creates a slightly crispy exterior, and cooks the meat evenly from edge to edge.
For years, chicken breast has been the go-to ingredient for home cooks seeking a healthy, protein-rich meal. Yet, it’s also one of the most misunderstood cuts of meat. Cook it too long, and it becomes dry and tough; undercook it, and you risk raw meat in the center. The air fryer eliminates that guesswork by creating a controlled, consistent cooking environment that locks in moisture and flavor.
This recipe doesn’t just teach you how to make juicy chicken breasts — it’s a small love letter to the art of simple, mindful cooking. Whether you’re preparing a quick weekday dinner, meal prepping for the week ahead, or creating a base protein to add to salads, wraps, and pasta, this air-fryer version will become a staple in your kitchen rotation.
The beauty of Air-Fryer Chicken Breast lies in its versatility. You can flavor it however you like — smoky BBQ, zesty lemon-pepper, garlic-parmesan, or spicy Cajun. It’s equally at home on a plate with roasted vegetables as it is sliced over a Caesar salad or tucked into a sandwich.
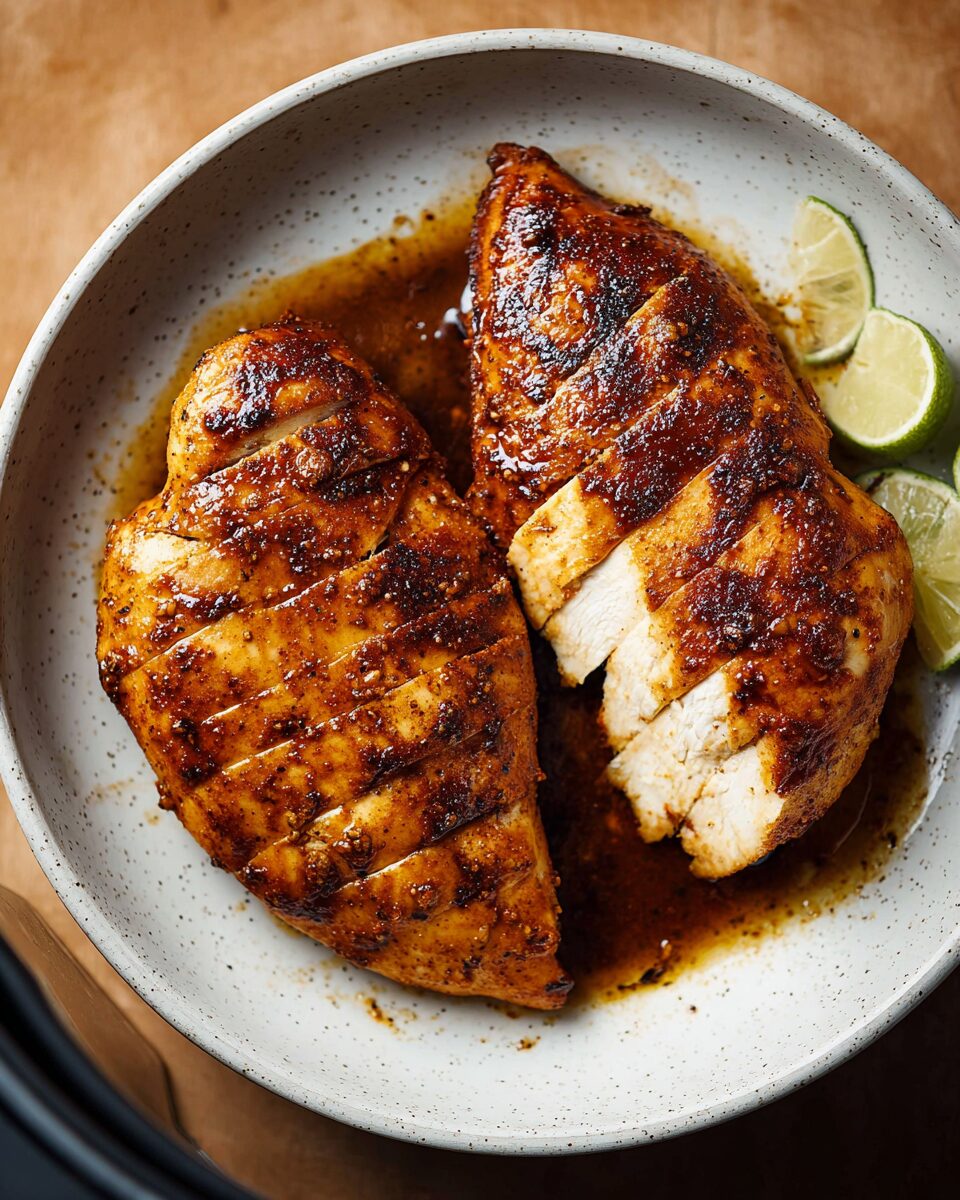
Growing up, we might have thought of chicken breast as a “diet food” — something plain and practical. But the air fryer has completely redefined that perception. Imagine cutting into a perfectly cooked chicken breast that’s seasoned with aromatic herbs, a hint of spice, and a golden crust that crunches slightly before revealing tender, steaming meat beneath. No oven preheating, no oil splatter, no stress — just beautiful results every time.
This recipe is not just about cooking; it’s about rediscovering how a simple technique can turn an everyday ingredient into something spectacular. If you’ve ever struggled with dry chicken, this is your redemption moment. Get ready to make the juiciest, crispiest, most flavorful chicken breast you’ve ever had — all with minimal effort and cleanup.
Let’s get started on this modern classic that proves healthy eating doesn’t have to mean sacrificing flavor.
Full Recipe
Ingredients
For the Chicken:
- 2 boneless, skinless chicken breasts (about 8 oz / 225 g each)
- 1 tablespoon olive oil (or avocado oil)
- 1 teaspoon garlic powder
- 1 teaspoon onion powder
- 1 teaspoon smoked paprika
- ½ teaspoon dried thyme (or Italian seasoning)
- ½ teaspoon salt
- ¼ teaspoon black pepper
- Optional: ¼ teaspoon cayenne pepper (for heat)
Optional Marinade (for deeper flavor):
- 2 tablespoons olive oil
- 1 tablespoon lemon juice
- 1 teaspoon Dijon mustard
- 2 cloves garlic, minced
- 1 teaspoon honey or maple syrup (for balance)
Directions
Step 1: Prepare the Chicken
Start by trimming the chicken breasts of any excess fat or connective tissue. If they’re very thick, consider slicing them in half horizontally or pounding them to an even thickness (about ¾ inch). This helps them cook evenly — a key step in ensuring juicy results.
Tip: Place the chicken between two pieces of plastic wrap or parchment paper before pounding to prevent mess.
Next, pat the chicken breasts dry with paper towels. Removing surface moisture is crucial for achieving a slightly crisp, golden exterior in the air fryer.
Step 2: Season or Marinate
You can season the chicken directly or marinate it for extra flavor.
- For quick seasoning: Drizzle olive oil over the chicken and sprinkle on the garlic powder, onion powder, paprika, thyme, salt, and pepper. Rub the spices evenly on both sides, ensuring every part of the chicken is coated.
- For marinating: Combine all the marinade ingredients in a small bowl. Add the chicken breasts and toss to coat. Let them sit for 30 minutes (or up to 4 hours) in the refrigerator.
The marinade not only infuses the chicken with flavor but also helps tenderize the meat — a trick worth doing when you have extra time.
Step 3: Preheat the Air Fryer
Preheat your air fryer to 375°F (190°C) for about 3 minutes. Preheating ensures the chicken starts cooking immediately when it hits the basket, giving it that perfect sear-like effect and helping lock in juices.
If your air fryer doesn’t have a preheat function, just let it run empty for a few minutes at the same temperature.
Step 4: Air Fry the Chicken
- Lightly oil the basket: Spray or brush a little oil in the air-fryer basket to prevent sticking.
- Arrange the chicken: Place the chicken breasts in the basket in a single layer, leaving a bit of space between them for airflow.
- Cook: Air fry for 9–10 minutes, then flip the chicken and cook for another 8–9 minutes on the other side.
Total cook time is usually 17–18 minutes, depending on the thickness of your chicken and the power of your air fryer.
- Check for doneness: The internal temperature should reach 165°F (74°C). Use a digital meat thermometer for accuracy — it’s the best way to ensure perfect results every time.
Tip: If your chicken breasts are small or thin, start checking around the 14-minute mark.
Step 5: Rest and Serve
Once done, remove the chicken from the air fryer and let it rest for at least 5 minutes before slicing. Resting allows the juices to redistribute throughout the meat, ensuring every bite is moist and flavorful.
Slice, serve, and enjoy!
Serving Suggestions & Variations
1. Classic & Simple
Serve the air-fried chicken breast alongside roasted vegetables or mashed potatoes. Drizzle a bit of lemon juice or melted butter over the top for a simple, satisfying meal.
2. Healthy Salad Topping
Slice the chicken thinly and serve it over a crisp green salad — think mixed greens, cherry tomatoes, cucumbers, and avocado with a light vinaigrette. It’s perfect for lunch or meal prep.
3. Wraps & Sandwiches
Use the chicken in wraps, sandwiches, or paninis. Pair it with lettuce, tomato, cheese, and your favorite sauce. A honey mustard or garlic aioli adds a gourmet touch.
4. Creamy Pasta Twist
Cut the chicken into strips and toss it into a creamy Alfredo or pesto pasta. The air-fried texture holds up beautifully in rich sauces.
5. Spicy Cajun Version
Mix 1 teaspoon Cajun seasoning into your spice blend for a smoky, bold flavor. Serve with coleslaw or cornbread for a Southern-inspired meal.
6. Lemon-Herb Mediterranean Style
Season with oregano, garlic, and lemon zest. Serve over a bed of couscous or quinoa with olives, cherry tomatoes, and feta cheese.
7. Asian-Inspired Glaze
Brush cooked chicken with a mixture of soy sauce, honey, and sesame oil for a sticky, flavorful finish. Sprinkle with sesame seeds and green onions.
Tips & Tricks
- Don’t overcrowd the basket: Air fryers work by circulating hot air. Overcrowding will prevent even cooking and crisping. Cook in batches if necessary.
- Thickness matters: Uniform thickness ensures the chicken cooks evenly. Pounding the chicken flat is worth the effort.
- Resting is non-negotiable: Cutting too soon will cause the juices to escape. Always rest before slicing.
- Avoid over-seasoning with salt: Since air fryers concentrate flavor, too much salt can overpower the taste.
- Marinate overnight for maximum flavor: If meal prepping, marinate in a ziplock bag overnight for deeper seasoning.
- Use a thermometer: Don’t rely solely on time. Chicken breast should always reach 165°F (74°C) at the thickest part.
- To keep it juicy: Brine your chicken for 15–30 minutes in salted water before cooking. This locks in moisture beautifully.
- For crispy texture: Pat dry thoroughly before air frying. Excess moisture prevents browning.
- Storage: Cooked chicken can be stored in the refrigerator for up to 4 days or frozen for up to 2 months. Reheat in the air fryer at 350°F (175°C) for 4–5 minutes to regain crispness.
- Make-ahead meal prep: Slice the cooked chicken and portion it into containers with sides like rice, veggies, or quinoa for quick weekday meals.
Nutritional Info (Per Serving)
| Nutrient | Amount |
|---|---|
| Calories | 210 kcal |
| Protein | 36 g |
| Carbohydrates | 1 g |
| Fat | 7 g |
| Fiber | 0 g |
| Sodium | 400 mg |
| Sugar | 0 g |
Note: Nutritional values are estimates and can vary based on exact ingredients and cooking methods.
Additional Info
- Prep Time: 10 minutes
- Cooking Time: 18 minutes
- Total Time: 28 minutes
- Calories per serving: 210 kcal
- Servings: 2
Final Thoughts
The Air-Fryer Chicken Breast is proof that simplicity can be absolutely delicious. In under 30 minutes, you can have a juicy, tender, and flavorful dish that feels like a culinary triumph — with barely any oil and almost no cleanup. It’s the kind of recipe that effortlessly fits into busy lives while still delivering homemade comfort.
It’s also endlessly adaptable — once you master this method, you can explore countless seasoning profiles and meal combinations. The air fryer turns what could be a mundane piece of chicken into a golden, flavorful delight that works for lunchboxes, dinner tables, and even special occasions.
So the next time you’re craving something healthy, satisfying, and quick, remember this recipe. Fire up your air fryer, grab a couple of chicken breasts, and let the magic happen. The result will be so tender and flavorful that it might just become your new go-to for any day of the week.
Cooking doesn’t always have to be complicated — sometimes, it’s as simple as seasoning well, trusting your air fryer, and letting good ingredients shine. Share this dish with your family, friends, or meal-prep partners — because good food, after all, tastes even better when shared.