There are certain desserts that capture a feeling — not just a flavor — and for me, lemon bars are one of them. These bright, tangy squares have been my go-to treat since the first time I baked them on a rainy spring afternoon years ago. The smell of butter, sugar, and lemon zest wafting through the kitchen was so pure and comforting that it instantly became a family favorite.
What I love most about lemon bars is their bold simplicity. No elaborate frosting, no fancy layers — just a buttery shortbread base topped with a silky, tart lemon curd that’s baked to perfection. The combination is timeless, humble, and yet utterly irresistible. When I call these My Favorite Lemon Bars, I mean it — they’re the perfect balance of sweet and sour, rich and refreshing.
Lemon bars have a fascinating history. They first appeared in American cookbooks around the 1960s, when citrus fruits became more widely available and home bakers were looking for bright, simple desserts. The Midwest in particular embraced them — a cheerful counterpoint to cold winters. Generations of bakers have since passed down their versions, tweaking the crust, adjusting the tartness, or dusting the top with just the right amount of powdered sugar.
My version? It’s unapologetically tart. These bars don’t shy away from lemon flavor — they celebrate it. Each bite offers that puckering zing that makes your mouth water in the best way possible, tempered by a buttery crust that melts away like shortbread sunshine.
They’re the kind of dessert that fits every occasion:
- A bright addition to Easter brunch.
- A nostalgic dessert for summer picnics.
- A cheerful bake for gray, gloomy days when you need a dose of sunshine.
Serve them chilled on a warm day, or slightly warm with a cup of tea in the winter. They’re endlessly versatile — and the longer they sit in the fridge, the better they taste as the lemon flavor deepens and settles.
If you’ve ever tasted a lemon bar that was overly sweet, you’ll appreciate this version. My recipe leans on the tart side, letting that natural citrus sharpness shine through. You’ll taste real lemons — not lemon extract, not artificial flavoring — just the genuine brightness that only fresh zest and juice can deliver.
Making these bars has become something of a ritual for me. I zest the lemons first, letting the oils perfume the air. Then I press the buttery crust into the pan with my fingertips — that tactile moment where you know you’re creating something special. Finally, as the bars bake, the curd transforms from a thin, lemony liquid into a smooth, golden filling that jiggles ever so slightly in the middle when it’s ready.
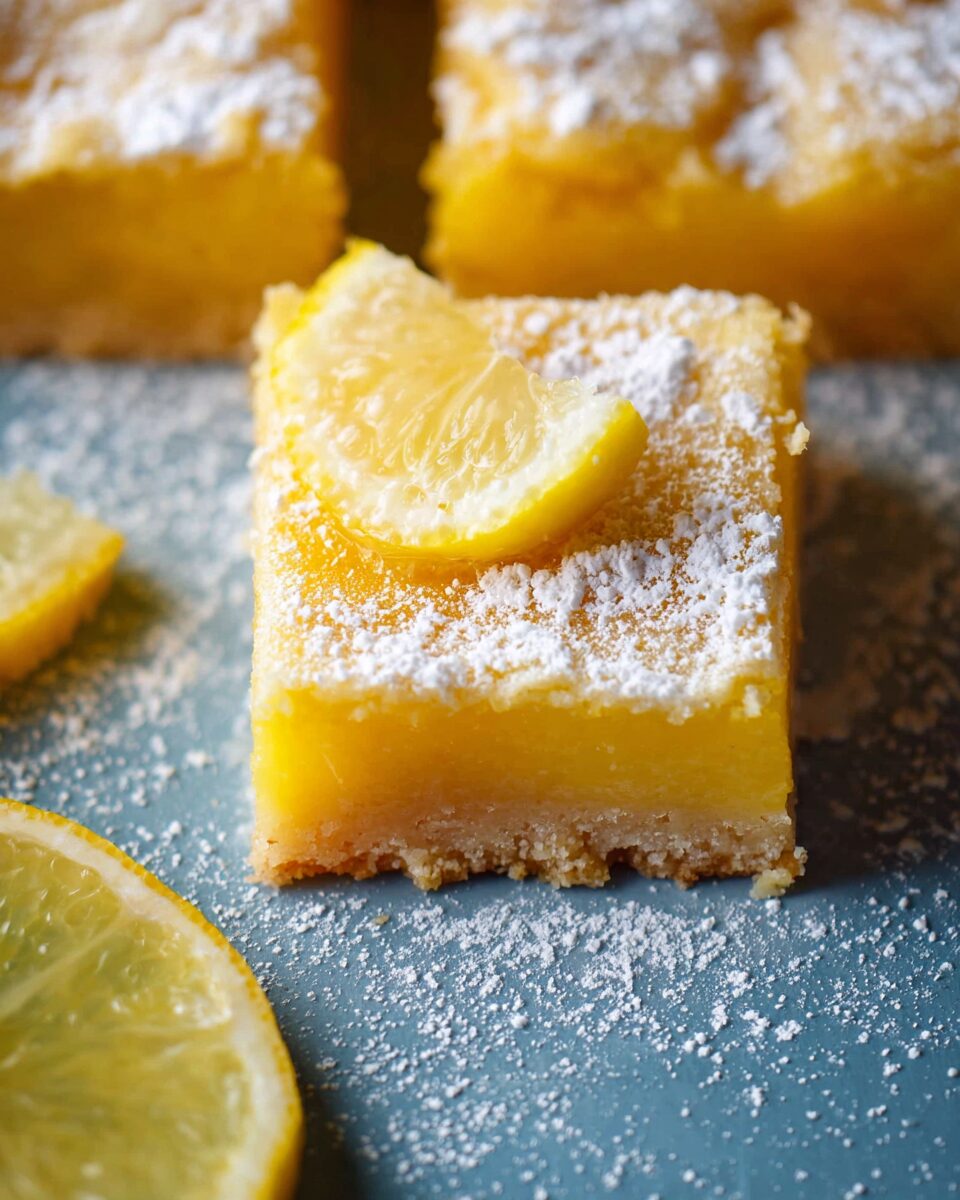
And once they cool, there’s that final magic touch: a generous dusting of powdered sugar that looks like the first snow of winter. Crisp edges, a soft center, and that tangy flavor that makes you close your eyes for just a second — pure happiness.
So if you’ve been searching for a lemon bar recipe that’s ridiculously tart, perfectly balanced, and easy to make, this one’s for you. Let’s dive into the details — I’ll walk you through every step so you can make these dreamy lemon bars from scratch, and enjoy every bite as much as I do.
Full Recipe
Ingredients
For the Shortbread Crust
- 1 cup (2 sticks / 226 g) unsalted butter, softened
- ½ cup (100 g) granulated sugar
- 2 cups (250 g) all-purpose flour
- ¼ teaspoon fine sea salt
- 1 teaspoon pure vanilla extract (optional, for a hint of warmth)
For the Lemon Filling
- 1 ½ cups (300 g) granulated sugar
- ¼ cup (30 g) all-purpose flour
- 4 large eggs, room temperature
- ¾ cup (180 ml) freshly squeezed lemon juice (from about 4–5 lemons)
- 2 tablespoons finely grated lemon zest
- Pinch of salt
For Finishing
- Powdered sugar, for dusting (about 2–3 tablespoons)
Directions
Step 1: Prepare Your Pan
Preheat your oven to 350°F (175°C) and line a 9×13-inch baking pan with parchment paper, leaving a bit of overhang on two sides for easy lifting later. This step ensures that once your bars are baked and cooled, you can lift them out in one piece for clean slicing.
Pro Tip: Lightly grease the parchment before pressing in the crust — it prevents sticking and helps the crust bake evenly.
Step 2: Make the Shortbread Base
In a large mixing bowl, cream together the butter and sugar until smooth and fluffy — about 2–3 minutes using an electric mixer on medium speed. Add the vanilla if using. Then, mix in the flour and salt until the dough comes together into a crumbly, sandy texture.
Press this mixture firmly and evenly into the prepared baking pan. Use your fingertips or the bottom of a flat glass to compact it well — this ensures a crisp, sturdy crust that won’t crumble when sliced.
Bake for 18–20 minutes, or until the edges are lightly golden. Remove from the oven and set aside to cool slightly while you prepare the filling.
Tip: Don’t overbake the crust — it will bake again with the filling, and overdoing it now can make the final bars too dry.
Step 3: Whisk Together the Lemon Filling
While the crust is baking, whisk together the sugar and flour in a large bowl. The flour prevents the filling from separating and helps it thicken just enough.
Add the eggs and whisk until smooth and well combined — avoid overmixing to prevent bubbles that can cause cracks later.
Pour in the freshly squeezed lemon juice, zest, and a pinch of salt. Whisk again until everything is beautifully blended and fragrant.
Lemon Tip: Always zest your lemons before juicing — it’s nearly impossible to do it the other way around!
Step 4: Pour and Bake
Carefully pour the lemon mixture over the warm crust. Tilt the pan slightly to spread it evenly if needed.
Return the pan to the oven and bake for 20–25 minutes, or until the center is just set and no longer jiggles when gently shaken. The surface should look matte rather than shiny.
If you’re unsure, insert a toothpick near the center — it should come out mostly clean with just a tiny bit of moisture, not raw batter.
Step 5: Cool and Chill
Once baked, remove the pan from the oven and allow it to cool at room temperature for at least 1 hour. Then, transfer to the refrigerator for another 1–2 hours before cutting.
This chilling step is crucial — it allows the lemon curd to firm up and the flavors to deepen. Cutting them too soon can result in a runny filling.
Step 6: Slice and Serve
Use the parchment overhang to lift the bars from the pan. Place on a cutting board and dust generously with powdered sugar using a fine mesh sieve.
For perfectly clean slices, use a sharp knife and wipe the blade between each cut. Cut into 16 squares for larger bars or 24 smaller ones if you’re serving a crowd.
Serving Tip: If the powdered sugar melts after a while, simply dust again before serving for that fresh, snowy look.
Serving Suggestions & Variations
These lemon bars are divine on their own, but you can easily personalize them to match any occasion or craving.
1. Classic Style (As Written)
Bright, tart, and buttery — the perfect contrast of textures. Serve chilled for the ultimate refreshing dessert.
2. Creamy Lemon Bars
Add 2 tablespoons of heavy cream or sweetened condensed milk to the lemon mixture for a slightly creamier, custard-like texture. This mellows the tartness just a touch.
3. Meyer Lemon Bars
Substitute regular lemons with Meyer lemons for a milder, floral flavor. They’re naturally sweeter and less acidic — ideal for those who prefer a softer citrus taste.
4. Gluten-Free Version
Replace the all-purpose flour in both crust and filling with a 1:1 gluten-free baking blend. Almond flour can also work beautifully in the crust, lending a nutty, delicate flavor.
5. Coconut-Lemon Bars
Stir ½ cup of shredded coconut into the crust before baking. It adds subtle texture and a tropical note that complements the lemon’s brightness.
6. Berry Lemon Bars
Before baking the filling, scatter a handful of fresh raspberries or blueberries over the warm crust. They bake into the curd and create bursts of fruity sweetness in each bite.
7. Lemon-Lime Twist
For an extra punch, replace ¼ cup of lemon juice with fresh lime juice and add 1 teaspoon of lime zest. It adds a zingy tropical balance that’s irresistible.
Tips & Tricks
Making lemon bars is simple, but mastering them takes a few insider secrets. Here’s how to get perfect results every time:
- Use Fresh Lemons Only
Bottled lemon juice can never match the complexity and fragrance of fresh lemons. Always zest and juice real lemons for the best flavor. - The Right Lemon-to-Sugar Ratio
If you love tart desserts, stick to this recipe as is. For a milder version, reduce the lemon juice to ½ cup or increase sugar to 1¾ cups. - Avoid Overmixing the Filling
Overwhisking introduces air bubbles that can cause cracks on the surface. Gently mix until just combined. - Don’t Skip the Cooling Step
Patience pays off — chilling allows the bars to set properly and slice beautifully. - Powdered Sugar Timing
If you plan to store the bars, dust them with powdered sugar right before serving. The sugar absorbs moisture in the fridge and can disappear if added too soon. - Storage Tips
Store lemon bars in an airtight container in the fridge for up to one week. You can also freeze them (without powdered sugar) for up to 3 months. Thaw in the fridge overnight and dust before serving. - Make-Ahead Option
These bars actually taste better the next day! Bake a day in advance for deeper, more harmonious flavor. - Scaling the Recipe
Need to feed a crowd? Double the recipe and bake in a 9×13 pan plus an 8×8 pan, or a larger sheet pan. Just keep an eye on baking time — thicker layers need a few more minutes.
Nutritional Info (Approximate per serving)
- Calories: 265 kcal
- Total Fat: 12 g
- Saturated Fat: 7 g
- Cholesterol: 75 mg
- Carbohydrates: 36 g
- Sugars: 25 g
- Protein: 3 g
- Fiber: 1 g
- Sodium: 70 mg
(Values based on 16 servings; actual values may vary depending on portion size and ingredients used.)
Additional Info
- Prep Time: 20 minutes
- Cooking Time: 40–45 minutes
- Chilling Time: 1–2 hours
- Total Time: About 2 hours 30 minutes
- Calories per Serving: ~265 kcal
- Servings: 16 large bars or 24 smaller bars
Final Thoughts
There’s something magical about the way these ridiculously tart lemon bars brighten up any day. They’re vibrant, cheerful, and perfectly balanced — just the right amount of sweet, the right amount of sour, with that buttery foundation that makes every bite luxurious.
Whether you’re baking them for a family gathering, a bake sale, or simply because you crave something refreshing after dinner, they never fail to impress. The best part is how forgiving the recipe is — no special equipment, no complicated steps, just honest, delicious ingredients that come together into something extraordinary.
Once you try them, I promise they’ll earn a permanent place in your dessert rotation. You might even find yourself squeezing a few extra lemons just to make another batch the next day — I’ve been there!
So go ahead: preheat your oven, grab some lemons, and fill your kitchen with sunshine. Then, when you take that first tangy, buttery bite, you’ll understand why these really are my favorite lemon bars — ridiculously tart, delightfully simple, and absolutely unforgettable.