There are few desserts that embody comfort, nostalgia, and pure joy quite like the classic sugar cookie. Soft, buttery, and perfectly sweet, it’s the kind of treat that brings you back to childhood — when baking meant sprinkles everywhere, licking the spoon, and waiting impatiently by the oven for the first golden batch to come out.
But what if I told you that you could have all the flavor and texture of your favorite soft sugar cookies, without the rolling, cutting, and shaping? Enter: Soft and Chewy Sugar Cookie Bars — the ultimate shortcut to sugar cookie heaven.
This recipe captures everything you love about traditional sugar cookies — that buttery vanilla flavor, the tender crumb, the melt-in-your-mouth chewiness — and transforms it into a fuss-free bar form. No chilling dough, no flour-dusted countertops, and no endless trays rotating in and out of the oven. Just one pan, one bake, and a batch of golden, chewy perfection.
I still remember the first time I made these sugar cookie bars. It was one of those cozy Sunday afternoons when I wanted the warmth of homemade cookies but didn’t feel like spending the whole day in the kitchen. I poured the dough into a baking pan, spread it evenly, and waited. When it came out, the entire house smelled like butter, sugar, and vanilla — that irresistible scent that makes people wander into the kitchen asking, “What’s baking?”
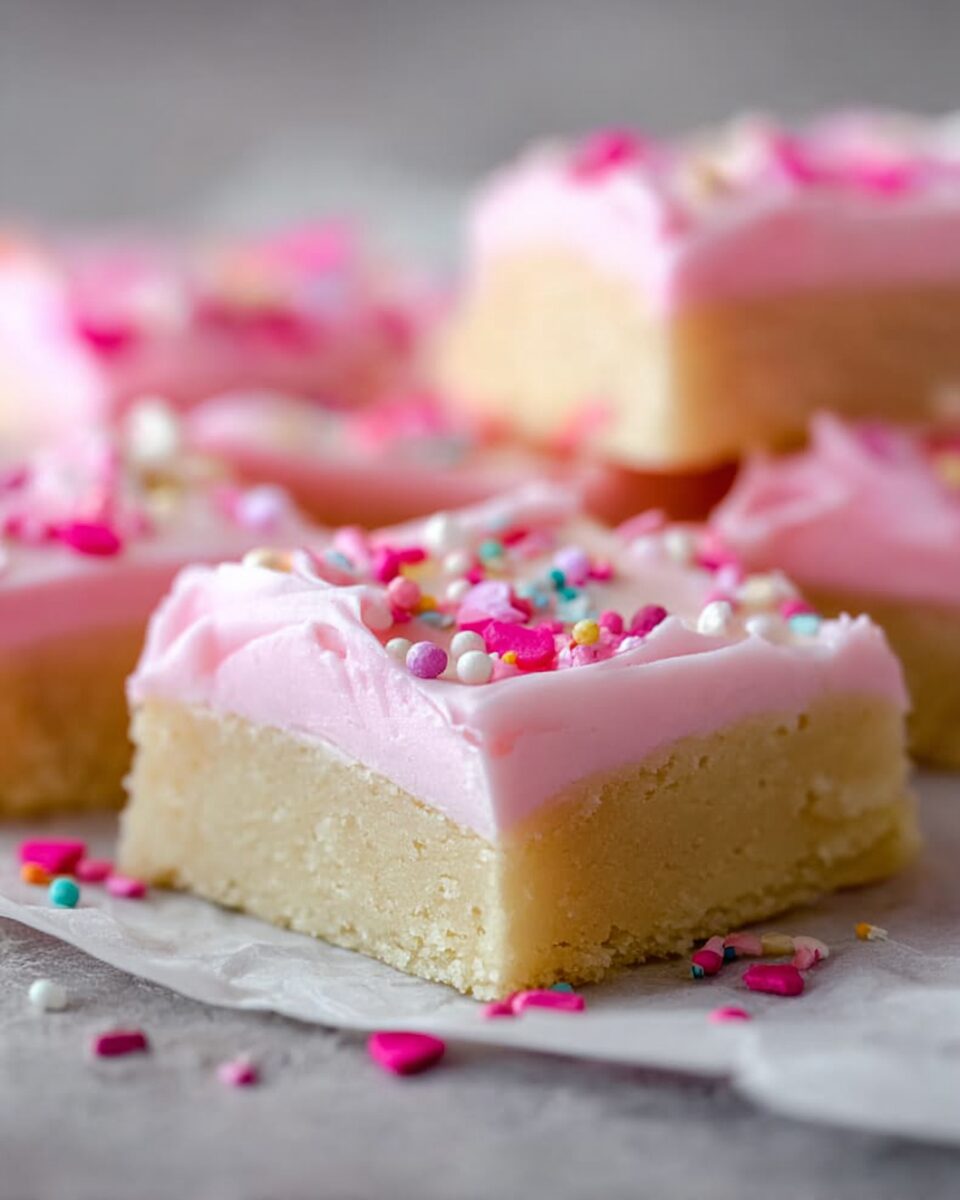
Once cooled, I spread on a layer of creamy buttercream frosting, added a generous handful of sprinkles, and cut the slab into squares. The result? Heaven in every bite. Soft and chewy in the middle, slightly crisp on the edges, and perfectly sweet without being overwhelming.
These sugar cookie bars are ideal for any occasion — from bake sales and birthday parties to holidays or simple weeknight desserts. They’re easy to transport, quick to make, and universally loved. Kids adore the sprinkles and frosting; adults appreciate their nostalgic, buttery charm.
Sugar cookies themselves have a long and heartwarming history. Originating in the mid-1700s, they’re said to have first been made by German Protestant settlers in Pennsylvania. Known then as the “Nazareth Sugar Cookie,” this simple, sturdy treat quickly became a household favorite across America. Over time, variations emerged — rolled, cut, frosted, or dusted with sugar — but the essence remained the same: pure, simple sweetness.
My sugar cookie bars take inspiration from that tradition while making it modern and practical. You still get the joy of homemade baking, but without the time-consuming steps. Whether you’re baking for the holidays or just need a sweet pick-me-up on a rainy afternoon, these bars are your go-to recipe for instant happiness.
So, if you’ve ever dreamed of soft, buttery cookies that practically melt in your mouth — but in bar form — get ready to fall in love with these Soft and Chewy Sugar Cookie Bars. Let’s dive in!
Full Recipe
Ingredients
For the Sugar Cookie Bars
- 2 ¾ cups (345 g) all-purpose flour
- ½ teaspoon baking powder
- ½ teaspoon baking soda
- ½ teaspoon salt
- 1 cup (226 g) unsalted butter, softened to room temperature
- 1 ½ cups (300 g) granulated sugar
- 1 large egg, room temperature
- 1 large egg yolk
- 2 teaspoons pure vanilla extract
- ½ teaspoon almond extract (optional, for that classic sugar cookie flavor)
For the Frosting
- ½ cup (113 g) unsalted butter, softened
- 2 cups (240 g) powdered sugar, sifted
- 1–2 tablespoons heavy cream or milk
- 1 teaspoon pure vanilla extract
- Pinch of salt
- Food coloring (optional)
- Sprinkles (optional, but highly recommended!)
Directions
Step 1: Prepare Your Pan and Preheat the Oven
Preheat your oven to 350°F (175°C).
Grease a 9×13-inch baking pan or line it with parchment paper, leaving an overhang on two sides so you can lift the bars out easily after baking. This trick makes cutting clean squares so much easier — and keeps cleanup minimal.
Step 2: Mix the Dry Ingredients
In a medium bowl, whisk together the flour, baking powder, baking soda, and salt. Set aside.
This step ensures your leavening agents and salt are evenly distributed before combining with the wet ingredients. It prevents any uneven rising or salty bites later on.
Step 3: Cream the Butter and Sugar
In a large mixing bowl (or the bowl of a stand mixer fitted with the paddle attachment), beat the softened butter and granulated sugar on medium-high speed for about 2–3 minutes, until light and fluffy.
This step is key — creaming the butter and sugar incorporates air into the mixture, which gives your bars their soft and tender texture.
You’ll know it’s ready when the mixture is pale in color and looks slightly whipped.
Step 4: Add the Eggs and Flavorings
Add the egg and egg yolk one at a time, beating well after each addition. The extra yolk adds richness and chewiness — it’s one of the secrets to that melt-in-your-mouth texture.
Mix in the vanilla extract and almond extract (if using). The almond extract is optional but gives that nostalgic, bakery-style sugar cookie flavor that’s hard to resist.
Scrape down the sides of the bowl to make sure everything is evenly mixed.
Step 5: Combine Wet and Dry Ingredients
Reduce your mixer speed to low and gradually add the dry ingredients to the butter mixture. Mix until just combined — don’t overmix, or your bars may become tough.
The dough should be thick, soft, and slightly sticky.
Step 6: Spread the Dough
Transfer the dough to your prepared pan. Use a rubber spatula or your fingertips (lightly floured) to press and spread the dough evenly across the pan.
Take your time to smooth the top — the more even it is, the more uniform your bars will bake.
Tip: If the dough is sticking to your fingers, cover it with a piece of parchment paper and use it to press down evenly.
Step 7: Bake to Perfection
Bake for 18–22 minutes, or until the edges are lightly golden and the center looks set.
You don’t want to overbake these bars — they should remain soft and chewy. The top may look a little pale, and that’s okay! The residual heat will continue cooking them slightly once out of the oven.
Let the bars cool completely in the pan on a wire rack before frosting.
Step 8: Make the Frosting
In a large bowl, beat the softened butter until smooth and creamy. Gradually add the powdered sugar, one cup at a time, mixing on low speed until incorporated.
Add the vanilla extract, a pinch of salt, and 1 tablespoon of heavy cream or milk. Beat on high speed for 2–3 minutes until the frosting is fluffy and spreadable. Add more cream if needed to reach your desired consistency.
If you’d like to add color, mix in a few drops of gel food coloring now.
Step 9: Frost and Decorate
Once the cookie bars are completely cool, spread the frosting evenly over the top using an offset spatula or the back of a spoon.
Now for the fun part — add your sprinkles! Rainbow, pastel, holiday-themed, or even metallic — this is where you can get creative.
Pro Tip: For a clean, bakery-style look, chill the frosted bars for 15–20 minutes before slicing. This helps the frosting set slightly, giving you perfect edges.
Step 10: Slice and Serve
Lift the bars out of the pan using the parchment overhang and transfer them to a cutting board. Use a sharp knife to slice into squares or rectangles.
Each bite should be buttery, sweet, soft, and perfectly chewy — the kind of treat that disappears from the tray before you can even grab a second one.
Serving Suggestions & Variations
One of the best things about sugar cookie bars is how endlessly customizable they are. Here are a few fun ways to make them your own:
1. Classic Vanilla with Sprinkles
The traditional version — sweet, soft, and topped with vanilla frosting and colorful sprinkles. Perfect for birthdays, bake sales, or just a cheerful dessert.
2. Lemon Sugar Cookie Bars
Add 1 tablespoon of lemon zest and 1 tablespoon of lemon juice to the dough for a bright citrus twist. Top with lemon cream cheese frosting for a tangy, refreshing variation.
3. Holiday Sugar Cookie Bars
Customize the sprinkles and food coloring to fit the occasion — red and green for Christmas, pink and red for Valentine’s Day, orange and black for Halloween, or pastel shades for Easter.
4. Funfetti Bars
Fold ½ cup of rainbow sprinkles directly into the cookie dough before baking for a colorful surprise in every bite.
5. Frosting Flavors
Switch up your frosting by adding cocoa powder for chocolate frosting, a splash of peppermint extract for a holiday touch, or almond extract for a nostalgic bakery flavor.
6. Gluten-Free Version
Substitute the all-purpose flour with a 1:1 gluten-free baking blend. Be sure to use a brand that contains xanthan gum for structure.
7. Frosting-Free Bars
If you prefer a less sweet dessert, skip the frosting and simply sprinkle granulated or coarse sugar over the dough before baking. The result is subtly sweet and buttery — ideal for tea time.
Tips & Tricks
- Room Temperature Ingredients
Make sure your butter and eggs are at room temperature. This helps the ingredients blend smoothly, giving you a light, fluffy dough. - Don’t Overmix
Overmixing the dough once you add the flour can make your bars dense. Mix just until everything is combined. - Cool Completely Before Frosting
If the bars are even slightly warm, the frosting will melt and become runny. Patience pays off here. - Storage
Store the bars in an airtight container at room temperature for up to 3 days, or in the fridge for up to 1 week. They taste even better the next day! - Freezing
You can freeze unfrosted bars for up to 2 months. Wrap tightly in plastic wrap and foil, then thaw at room temperature before frosting. - Softness Secret
The extra egg yolk keeps these bars tender and chewy, while a touch of baking soda ensures they rise just enough. - Frosting Texture
If your frosting feels too thick, add a splash more milk or cream. If it’s too thin, add more powdered sugar, 1 tablespoon at a time. - For Perfect Squares
Use a long, sharp knife and clean it between each cut. For ultra-clean slices, refrigerate the frosted bars for 30 minutes before cutting. - Butter Quality Matters
Use real unsalted butter — not margarine — for the best flavor and texture. The richness of real butter makes all the difference. - Baking for a Crowd
This recipe easily doubles! Use a larger sheet pan and extend the baking time slightly, checking at 25 minutes.
Nutritional Info (Approximate per Serving)
- Calories: 290 kcal
- Total Fat: 14 g
- Saturated Fat: 9 g
- Cholesterol: 60 mg
- Carbohydrates: 38 g
- Sugars: 25 g
- Protein: 2 g
- Sodium: 130 mg
(Based on 16 servings; values will vary depending on frosting and toppings.)
Additional Info
- Prep Time: 15 minutes
- Cooking Time: 20 minutes
- Cooling Time: 30 minutes
- Total Time: 1 hour 5 minutes
- Servings: 16 bars
- Calories per Serving: ~290 kcal
Final Thoughts
There’s something truly magical about these Soft and Chewy Sugar Cookie Bars. They take the timeless joy of sugar cookies and make them even more approachable — no rolling, cutting, or chilling required. Just one pan of buttery, chewy perfection topped with creamy frosting and a sprinkle of fun.
They’re the kind of dessert that brings smiles wherever they go. You can bake them for school parties, potlucks, holidays, or lazy afternoons when you crave something sweet and homemade. Every bite tastes like a hug — soft, buttery, and filled with love.
The best part? They’re foolproof. Even beginner bakers can master this recipe on the first try. And once you do, you’ll find yourself coming back to it again and again. Because when life gets busy, there’s nothing better than a recipe that delivers homemade comfort with minimal effort.
So preheat your oven, grab that bag of sprinkles, and make these irresistible bars. Share them with friends, family, neighbors — or just keep a few for yourself (I won’t tell!). These Soft and Chewy Sugar Cookie Bars are more than dessert — they’re happiness baked in a pan.